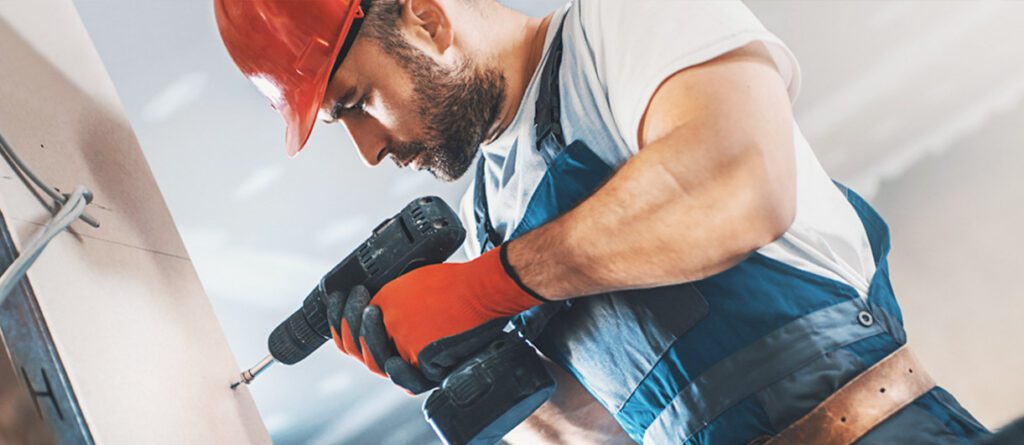
Drywall is also known as Gypsum board. This product is used extensively in North America. The boards are made from compressed gypsum sandwiched with layers of durable paper on both sides. They are usually manufactured in thicknesses of 1/2 inch, but some installations may require five-eighths. You can find many types of drywall on the market designed to withstand high moisture conditions, such as bathrooms. Placing the boards horizontally to reduce taped joints is a great idea. You can buy drywall boards that are up to 12 feet long. If possible, try to get lengths that extend from one side of the room. You will need to add a vertical joint if your room is more than twelve feet wide. The easiest part of the job is sizing and cutting drywall. Once you have taken the measurements, you need a straightedge and a utility knife. These measurements do not need to be exact. You will cut the same board twice as often if you are too precise. My experience shows that a drywall taper can fill gaps up to three-eighths inches in size. Begin your cut by placing the straightedge along the measured line. Then, pull the knife along that straight edge 2-3 more times to ensure you have cut through all of the paper. You don’t need to make any cuts in the gypsum. This will be explained in the next step. Take a small wood or drywall and slide it underneath the more significant piece. Then, snap the board along that cut line with a quick motion. Once the drywall has been cracked, bend the board backward to cut the paper on its back. For drywall installation, you will typically use 1.25 inches of drywall screws. However, some builders prefer 1.5-inch screws for ceiling support. Sometimes you might have to install drywall on top of an existing wall that is drywalled. If this happens, increase the length of your screws by thickness. This is not a problem, but ensuring that the screws go into the studs is vital. Experienced drywall installers will have the ability to use special tools to aid in their installation. Special electric drywall screwdrivers have a clutch that prevents you from tightening screws too tightly and drilling into boards further than recommended. These tools can also hold dozens of preloaded screws, which speeds up the process. A simple cordless drill might be as efficient if you only do one project. The drywall screws should be installed twelve inches along the outside edges and every sixteen inches in the middle. To prevent moisture from reaching the boards, keep them at least half an inch above the floor. This is particularly important if installing drywall on concrete floors. You might consider asking your friends to help you install the ceiling drywall. It could weigh between 70 and 80 pounds per sheet. I recommend attaching two pieces of two-by-fours to make a T-shaped shape. Once the board is in place, you can attach the drywall to the T-bar by inserting it underneath the other end. Taping and filling are the most critical part of the drywall construction process. Many people have attempted it. You can do this with practice and perseverance. However, I recommend you always seek professional help to ensure a smooth finish. For best results, apply primer to walls before you paint. You risk joints showing up if you skip the primer step. Your home’s walls are what give you security. You spend your entire life inside these walls. These walls can also enhance interior decor if they are well decorated. You can also hang family portraits or artwork on these walls. You can’t forget about the walls when you are renovating your home. So, install the drywall first. Although it is simple to install drywall, the tape is a more difficult task. Only professionals should tape drywall. It’s easy to calculate how much drywall you need by simply measuring the square footage of your walls and ceilings. If you don’t want too many joints in your wall drywall, this will require some planning. Drywall is available in many sizes, including 4X8, 4X10, 4X12 feet, and 4X12. Although the most common method of installing drywall is to run the long sides from the floor to the roof, it’s possible to save some joints by placing them horizontally at certain places. Some drywall sheets can be purchased from building-material stores with widths up to 10 or 12 feet. The thickness of the drywall sheets is 1/2 inch for walls and 5/8 inches for ceilings. However, verifying the local building code requirements is recommended before purchasing any drywall sheets. Once you have all other required items, such as screws and joint compound, it is time to start the actual installation. Then you can begin the existing installation. You will need an assistant to help you cut and install the wall panels. Make a pair of T-squares using 2 X 4, which should be about 1 inch longer than the distance between the floor and the roof. To form the Ts, the 2 X4s should be attached 3 feet from the ends of the longer 2 X 4. You can rent T-braces at hardware stores if this is too difficult. Use a sharp knife to cut the drywall panels carefully. Flip the board over and cut the paper from the opposite side. Smoothen the edges with sandpaper. Next, install the drywall panels. The drywall panels should have fewer joints than possible. It would help if you prepared cutouts for electrical outlets such as switches and other fixtures. Next, you will need to tap the drywall. Apply a joint compound to the drywall. Then, you will need to remove the drywall tape. Next, apply two thin coats of joint compound for a good finish. Once you’re done, remember to let the walls dry for at least five days, according to the joint compound manufacturer. Anyone can put drywall on their walls with some practice and skills. Installing drywall (or sheet rock) is relatively straightforward if you adhere to a few simple rules. While we will be covering how to drywall a dining area, the process is the same for all rooms. Tools: You will need a measuring tape and a T-square or straight edge at least 4 feet long. A drywall keyhole saw with extra blades. It will help if you do not use ink pens and markers on drywall. It is almost impossible to paint them later. A good drywall saw can be handy if you have the money. The saw is much more efficient than the knife, which can be used to make long straight cuts through the drywall. You will also need a sturdy ladder and saw horses. Most drywall today is installed with drywall screws and not nails. Screws don’t rust over time, resulting in “nail pops” in your finished work. A quality drywall screw gun is available for as low as $50. While cordless guns are more expensive, they make moving around much more accessible. Without the cords underfoot. Take measurements of your room to determine the length of the boards you can fit in the house. The dining room dimensions are 12 feet by 11 foot six inches. The ceiling measures eight feet in height. These dimensions would mean that our dining room would need eight boards measuring 4 x 12 ft each for the walls and three boards measuring 12 ft for the ceiling. Taping and Spackle work will be significantly more difficult if you use eight-foot boards that are held up as homeowners do. Twelve-foot boards would give you 84 feet of tape joints, excluding wall-to-ceiling and corner joints. You would need to have 132 feet of joints if you used eight-foot boards to attach to walls and ceilings. There are forty-eight feet more than twelve-foot boards. This is a lot more Spackle and taping and a lot more sanding. Make sure you use the giant boards possible. It is better to put your ceiling boards up first. Our sample room measures 11′-6″. It will have three boards. Measure diagonally from one corner to another, then measure the two other corners in the same manner. The room will be square if the measurements are equal. To ensure that the outer edge of the ceiling joist is directly above the cut sheet, you should make one if it is longer than the other. Ensure that the drywall edges are supported; this is essential. The following two rows should be installed once the first sheet has been cut. To fit the space of 11′-6″, the last or third-row may need to be trimmed along the long edge. Three full sheets would measure twelve feet. All three sheets in my sample room would require 6 inches to be removed from the 4′ wide end. When using screws, placing them on eight-inch centers along the edges is a good idea. Double screws should be placed in the fields at eight-inch centers. This ensures adequate support and prevents sagging. Our sample room has walls that measure twelve feet in each direction and eleven feet six inches in the other. Start with a 12-foot wall and place the first sheet horizontally on the floor. While securing the second sheet, it will rest on top of the lower one. The walls measuring 11′-6″ will need to have removed six inches of the four sheets used there. To be secure, the walls will only need screws every eight inches along their edges and twelve on the fields. For fire rating, every occupied space in a house must be covered with at least one layer of Spackle and tape. It should be neat! Don’t leave any splatters, bumps, or ridges. It isn’t easy to sand the Spackle down to a smooth finish once it has dried. It will take three coats (each sanded between each coat) of Spackle if you plan to paint the room. The final sanding should be completely smooth. You can make a room look better if you are meticulous about it. We offer the above services at the following locations within Port St Lucie:
If you are located in Palm Beach County and you don’t see your city/area listed above, don’t worry! We cover all of Palm Beach County. Fill out the contact form above or CLICK HERE and send us a message. We’ll get back to you asap!
Drywall Installation
Contact Us

Locations We Serve